How to successfully install Huawei eNSP in 3 steps
Huawei Enterprise Network Simulator platform (eNSP) was developed by Huawei TechnologyLtd for the employees, partners, and customers to verify their planned network solutions without the need to use expensive physical hardware devices.
Prior to the installation of the software, there are some pre-requisites required to be fulfilled to ensure smooth setup and use of the platform on your Windows 10-based machines. Any machine that is not running Windows 10 may not run the eNSP simulator properly. The required software bundles are listed as shown below: eNSP V100R0003C00SPC100 Setup.zip VirtualBox-5.2.44-139111-Win.exe WinPcap_4_1_3.exe Wireshark-win64-3.2.5.exe
Each of the software components has its own functions. Oracle VirtualBox provides the virtualization platform for the network devices to be simulated as the real equipment in the network scenario. Wireshark and WinPcap provide packets and frames capturing for troubleshooting analysis while the key software Huawei eNSP is the working environment for the network solution deployment with the pre-bundled network devices as routers, switches, firewalls, WLAN access controllers & access points together with some host machines (eg. desktops, servers and clients) for the live simulated network deployment as per in the cases of proof of concepts, classroom-based training, and personal network testing solutions without the costly real hardware.
What’s next?
Where can I get the software bundle to jump start my ENSP virtualized deployment experience?
What are the steps that I can take to ensure that all required software are successfully setup?
How to start simulating a testing environment to perform proof of concepts (POC) and network related knowledge verification?
Part 1: Where to obtain the required software bundles for ENSP?
Step 1.1: Searching for the required software bundles.
It appears that Huawei Technologies has ceased support for the ENSP software, shifting their focus to the enhanced version, ENSP Pro. However, for those seeking access to the basic version of ENSP can still obtain and download the required software via the this download link. Alternatively, you may visit our Facebook ENSP Download page for as well.
Note: Only Oracle VirtualBox version 5.2.44 is highly recommended to ensure ENSP works. If your machine has other versions, kindly uninstall it before installing this version. If your machine has NPcap software, uninstall it before installing WinPcap.
Once all the required files are downloaded successfully as shown, you may proceed to the next step.
Part 2: 4 software bundles… Which should I install first?
The installation sequence is very important, eNSP is a software that is dependent on the other 3 softwares. Hence, it will be the last software to be installed.
Step 2.1: Install WinPcap software on Windows 10 machine.
Navigate to the Download file location. Run the installation as an administrator to get full access for the installation. Select WinPcap setup file to start the installation.
Step 2.2: Run the setup of WinPcap to begin the installation
Run Setup to begin the installation.Uncheck the checkbox to disable auto-restart of the machine after installation.WinPcap setup completed
The first software is successfully installed. You may now proceed with the next required software to download.
Step 2.3: Install the Wireshark software.
Proceed to the download folder to begin the Wireshark software installation as shown below.
Run the Wireshark setup to begin the installation.
Keep the default settings as shown and proceed.
Leave the settings as it is and proceed with Next.Proceed with Next if Wireshark desktop icon is not required to appear on desktop screen.You can take the default installation folder and proceed.To prevent conflicts with the WinPcap application during installation, uncheck the checkbox that allows the installation of Npcap.Proceed with default settingsWireshark installation is completed. Click Finish to complete it.
The setup for two software applications has been completed successfully. You may proceed with the next software to install.
Step 2.4: Install Oracle VirtualBox 5.2.44 on Windows 10
To ensure a successful installation of eNSP, it’s crucial to use VirtualBox version 5.2.44, which is compatible with the Windows 10 platform. Since Huawei has discontinued support for eNSP, newer versions of VirtualBox may not be compatible. Therefore, sticking to the specified version is essential for seamless functionality.
Navigate back to the Download folder to locate the software and start the installation as shown below.
Run VirtualBox 5.2.44 installation setup to begin
Step 2.5: Leave the settings as default and proceed with the installation.
Proceed with the default settings for installationProceed with default settingsProceed with default settings to complete the installation
Step 2.6: Preparing for Huawei eNSP installation on Windows 10
Finally, Huawei eNSP is the last software component to be installed as it depends on the other three application software to work, Before the installation begins, proceed to disable Windows 10 Security Firewall or any third party firewalls.
Disable Windows Defender Firewall prior to the eNSP installation.
You can temporarily disable the Windows Defender Firewall before the installation begins.Turn off Windows firewall functions on both public and private networks.
After the deactivation of Windows Defender Firewall, you can see the settings turned off.
Windows Firewall status is now disabled.
Step 2.7: Extract the compressed eNSP setup file before executing the installation from the download folder.
The eNSP file that is downloaded is a compressed file.
Extract the zipped eNSP setup file into a specific folder as shown below. Note: The file is not encrypted and does not need a password to decrypt the file.
Step 2.8: Installing eNSP network simulator on Windows 10
From the extracted folder, run the eNSP setup file as shown to begin the installation journey.
Double click on eNSP_Setup.exe to begin and proceed with the installation
Before proceeding with the subsequent steps, please do take note of the installation folder. Once the folder is selected, it cannot be changed. You can proceed with the default folder to setup.
Proceed with default settings and continue.
This installation step verifies the dependent modules need to be installed and available before the eNSP installation can be successfully proceeded.
eNSP can be proceeded after detecting the required software installed completely.
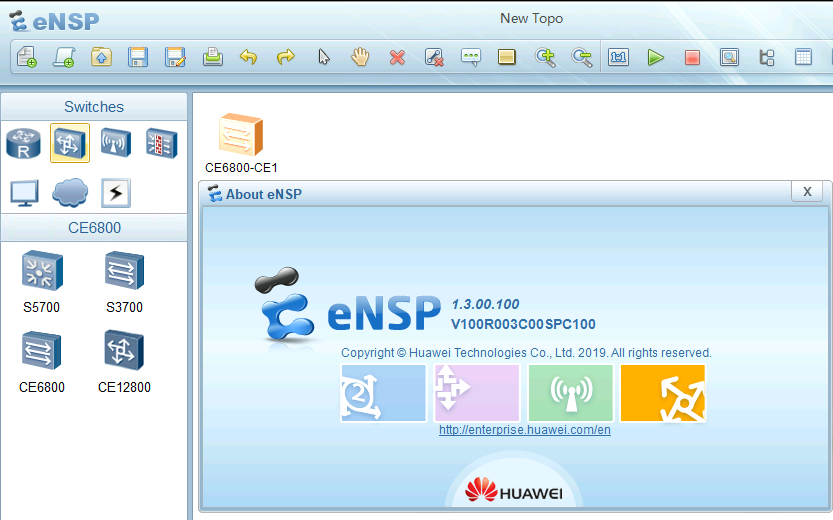
The final part of the eNSP installation prompts for the confirmed completion. You can choose to auto start the eNSP upon the completion. You may disable displaying the update logs.
Eventually the eNSP application is restarted and open for further configuration settings on the next part.
Step 2.9: Optimizing Huawei eNSP on Windows 10 PC with the virtualized Intel or AMD Architecture
Intel VT-x and AMD-V are sets of hardware extensions developed by INTEL and AMD respectively. They are primarily used to improve resource use and virtual machine performance. Virtualization done by the software can be a slow process which is why using the processor to help in this task can greatly improve the virtualized application performance.
All modern laptop and desktop machines come with Intel VT Virtualization or AMD Hardware Virtualization Feature on the mainboards. You can activate the feature on the BIOS setup of the machines. To access the BIOS of your own machine, kindly check for your vendor and model of your machine for the boot-up access procedures. Different vendors and models have different access procedure. (Refer to your machine manual guide or web portal for the steps). Depending on your machine processor platform, you can choose Option A or B to follow up. Both options are serving the same functionality to boost up the performance of eNSP running on your hardware.
A) Intel VT-x Virtualization activation
For those are running on Intel-based processor machines, you can access the relevant BIOS setup for Intel-VT feature activation as shown below.
Activating Intel-VT Feature
B) AMD-V virtualization activation
For those are running on AMD-based processor machines, you can access the relevant BIOS setup for AMD-V feature activation as shown below.
Activating AMD-V Feature
Note: The diagrams above show the illustration sample of the process of activating Hardware virtualization function on the Intel or AMD processor-based machines. Different vendors display slightly different screenshots.
Save the changes in the BIOS Setup after the feature selection and confirmation. Subsequently, reboot the machine before opening up the eNSP application again.
Open up the eNSP application to verify the hardware virtualization enabled and is working fine.
Open up Oracle VirtualBox from your Windows 10 machine to verify its simulated hardware devices run with virtualization feature enabled.
Open up VirtualBox to verify and fine tune hardware resource utilization
Next, move on with your installed eNSP to register and authorize the devices to be run.
Go to MENU, select TOOLS then choose REGISTER DEVICE.
Follow the step as shown below:
Follow the steps to register and authorize the devices
Select all the devices especially the highlighted ones and click REGISTER as shown below:
Select all the items with tick on the checkbox and click REGISTER
You can now test a sample topology with AR series routers to verify their functionality.
Part 3: How do we start the pre-deployment testing environment?
Step 3.1 You can pick a ready-made sample as shown in the diagram below:
Click on Example 1-1RIPv1&v2 to open up the topology.
Power up any of the two AR1220 routers to start the testing. The two routers have been randomly selected to power on as shown below:
Step 3.2 Double click the power-up router to start the console access of the router when you see the link status turns green in between router connection as shown below.
Eventually, your eNSP application setup is now successful and ready for deploying simulated solutions.
Final Words: The first part of How-To series on setting up Huawei eNSP is complete. If the blog does help in clarifying your ambiguity in running the simulator as well as getting your eNSP up and running, kindly show your generosity in giving us a LIKE and SHARE to motivate us to continue with the next series and helping others too. Appreciated your help.
Blog Author:
YAW HON SING Huawei certification and training system instructor for Datacom, and Artificial Intelligence track training. HCIE, HCSI, HCIP & HCIA